README

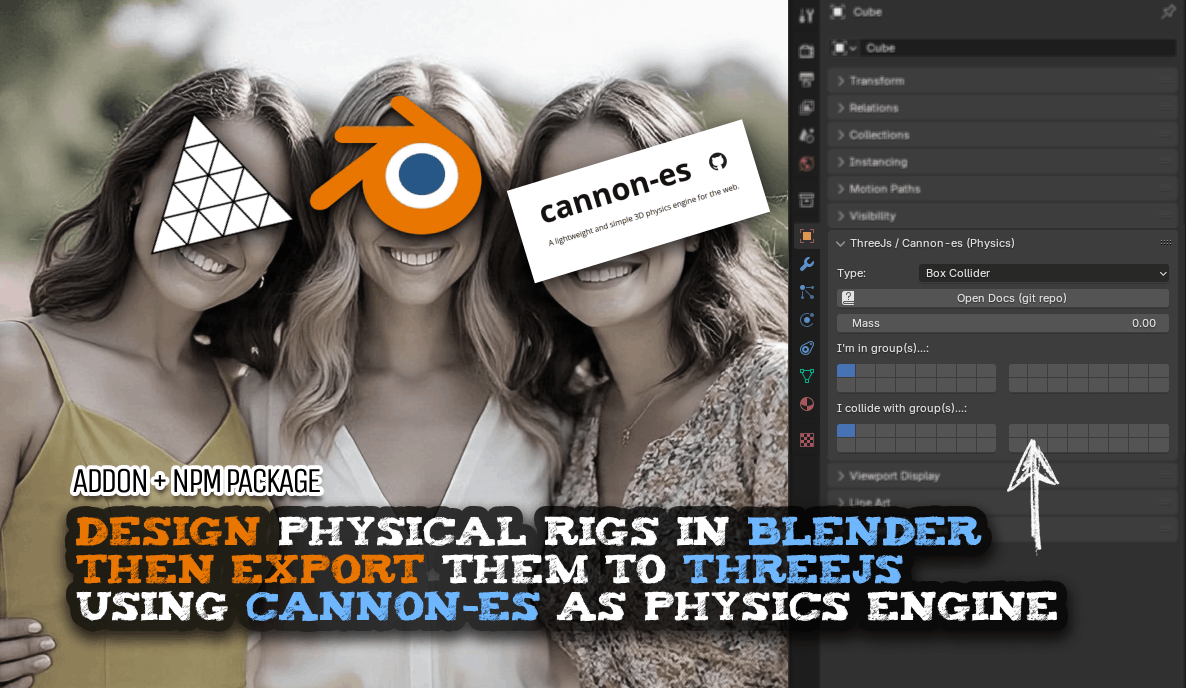
Table of Contents
- Who is this for?
- Features
- Test your rig
- Usage
- API
- Colliders / Bodies
- Constraints
- Relationship Lines
- Collision groups and masks
- Custom constaint
- License
ThreeJs / Cannon-es Scene Rigger
Design in Blender, simulate in Three!
Create and place physics colliders in Blender, export as GLB, and automatically set them up in three.js with cannon-es.
Watch Video Tutorial (Rigging a mechanical claw) Demo showcase app that inspired this addon: Mechanical Claw Machine
This solution includes two tools:
- A Blender addon for creating colliders in Blender
- An NPM package to rig the physics in Three.js using cannon-es
Who is this for?
Manually building complex physical rigs vía code can be a headache in the making. This toolset aims to make it a smooth visual experience. Focus on the design aspect in Blender, and let the devs work on the details once the rig is exported. Separate concerns.
Features
- Automatically creates Cannon bodies for Three.js objects defined inside of Blender ( using the addon ).
- Supports:
- box and sphere colliders
- hinge
- point
- distance
- lock
- glue childrens
- cable
- synchronization (copy location & rotation)
- :sparkles: your own custom constraint :sparkles:
Test your rig
You can quicly test your rig here: https://threejs-cannones-rigger.vercel.app Just make sure your glb has a camera and it is in the right angle where you want to focus on (it will use the camera in the file... so if you don't see anything maybe you forgot to export the cameras too)
Usage
1) Install the blender addon
Install from disk → threejs-cannones-addon.py
| Blender → Preferences | Add-ons → Install (.py) | New Object Panel |
|---|---|---|
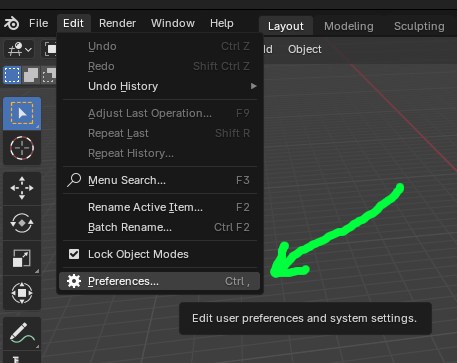 | 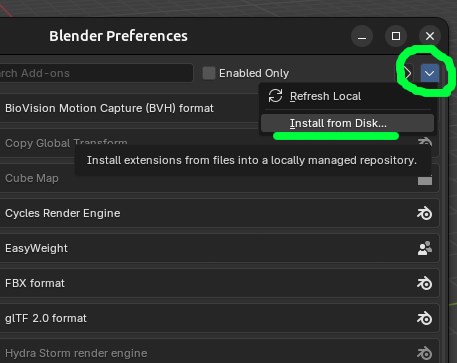 |  |
After installing, when you select an object in the scene inside of blender, you should see new expandable box appear in the Object's tab.
2) Scene Rigging
To create the colliders you work with Empty objects. Their scale is used to define the size of the collider. Sphere colliders can only have uniform scale. Typically you will/should use a Cube or Sphere empty for colliders, and any shape you want for the constraints (since their transform won't be used anyways just their data)
In Blender, when you select an object you will see on the right a panel titled "ThreeJs / Cannon-es (Physics)" From there, create empty objects or boxes or spheres and assign the corresponding options.
3) Export .glb
when you export as GLB make sure you tick the option "include custom properties"
4) Load in ThreeJs
npm install threejs-cannones-rigger
The load the GLB exported from blender like this...
See
src/main.tsfor a usage example.
import { World } from 'cannon-es';
import { ThreeJsCannonEsSceneRigger } from 'threejs-cannones-rigger';

// Assume you have a Cannon world and a loaded Three.js scene
const world = new World({ gravity: new Vec3(0, -10, 0) });
const scene = new THREE.Scene();

// Create the rigger and rig the scene
const rigger = new ThreeJsCannonEsSceneRigger(world, scene);

new GLTFLoader().load(url, file => {
    scene.add(file.scene)
    rigger.rigScene(file.scene); // *** this is where the magic happens ***
});

// To update physics and sync with Three.js in your animation loop:
function yourRenderLoop() {
    // ... update world, render scene, etc.
    rigger.update(deltaTime);
    //...
}
API
ThreeJsCannonEsSceneRigger
constructor(world: World, scene?: Object3D)
world: The Cannon-es physics world.scene(optional): The Three.js scene or root object to rig immediately.
Methods
rigScene(scene: Object3D): Scans the scene and creates physics bodies and constraints based on objectuserData.clear(): Removes all created bodies and constraints from the world and clears internal state.getBodyByName(name: string): Returns a Cannon body by the name (the name inuserData.name)
Colliders / Bodies
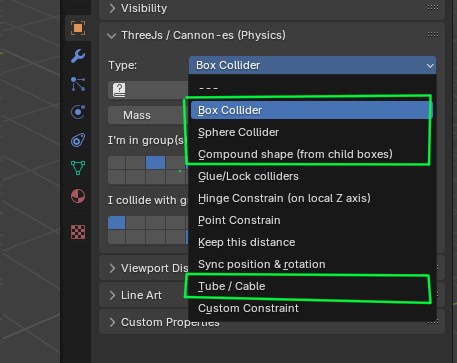
Box / Sphere Collider
Use a default Cube or UV Sphere. Scale and rotate as needed. Only spheres must be scaled uniformly; boxes can be stretched freely.
rigger.getBodyByName(name) //-> CANNON.Body
Compound Collider
Assign this to an empty. All children will be glued into one collider/Body. The children should be empty boxes with your desire scale, rotation and positioning.
Tube / Cable
Creates a flexible cable using threejs-cannones-tube. Add two child empties to the constraint object — one for the head, one for the tail. A and B can optionally anchor the ends.
Material : If the constraint body is a mesh (like a Box) it will use whatever material that mesh has and assign it to the mesh of the tube.
rigger.getCableConstraint(name)  //-> CableConstraint
rigger.getCableConstraint(name).cable //-> CannonTubeRig
Constraints
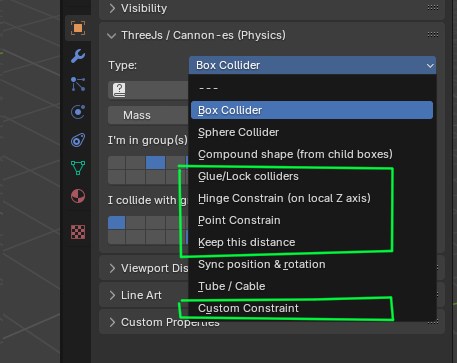
In all cases, when you call get___Constraint( name ) the expected name is the name of the object as you read it in blender. Which is automatically put in userData.name when you export to glb.
Glue/Lock Colliders
Connect two colliders (A & B) so they behave as a single rigid body. Creates a LockConstraint...
rigger.getLockConstraint(name) //-> CANNON.LockConstraint
Hinge Constraint
Assign to an empty. Local Z axis defines the hinge (like a door axis).
rigger.getHingeConstraint(name) //-> CANNON.HingeConstraint
Point Constraint
Links A and B via a shared point. Each keeps its relative position to it.
rigger.getPointConstraint(name) //-> CANNON.PointToPointConstraint
Keep This Distance
Maintains the initial distance between A and B, allowing movement but preserving separation.
rigger.getDistanceConstraint(name) //-> CANNON.DistanceConstraint
Sync Constraint
Use this on a visible object (e.g. mesh) to match the position & rotation of a physics collider.
rigger.getSyncConstraint(name) //-> SyncConstraint
Relationship Lines
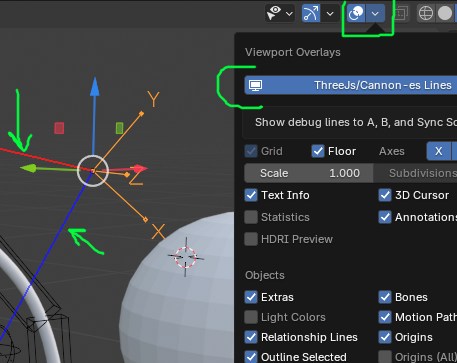 When a contraints references other objects, lines will appear to easily see their relationships with the currently selected object. You can toogle thouse lines on and off using the "Show Overlays" button.
Collision groups and masks
The panel will show two key properties for physics-based collision management when you select a collider's body type. You can select 1 or many (clicking and holding SHIFT)
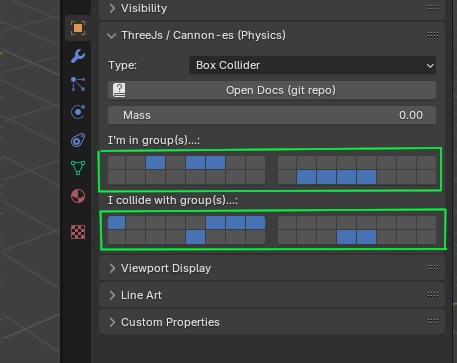
- Collision Group
collisionGroup: "I'm in group...". Bitmask. Defines which group(s) the selected object belongs to. This is a single group index (0–31) that identifies the object's collision category. - Collision Mask
collisionMask: "I collide with...".Bitmask. Specifies which group(s) the object collides with, using a 32-bit boolean array (checkboxes). Each checkbox corresponds to one of the 32 possible collision groups.
Understanding Collision Group and Mask
- Collision Group: Sets which group your object belongs to (0–31). Think of it as the object’s "team" in the physics simulation.
- Collision Mask: Controls which groups your object can collide with. Check boxes (1–32) to choose which "teams" it interacts with. For example, checking Group 2 means it collides with objects in Group 2.
When Collisions Don’t Happen
A collision between two objects won’t occur if their Collision Masks don’t include each other’s Collision Group. For example, if Object A’s mask doesn’t check Group 2, and Object B is in Group 2, they won’t collide, even if they touch in the physics simulation.
:sparkles: Custom constaint
In blender you can select "Custom Constraint" and pass a custom id (an arbitraty string of your choosing) then in javascript side, you define it like so:
rigger.registerCustomConstraint("myCustomID", config => {
    // this function will be called when parsing the scene and your custom id is detected...
    return yourConstraintInstance;
});

rigger.getCustomConstraint(name) //=>yourConstraintInstance
Your constraint should implement IConstraint.
The config you get has this shape:
| Property | Description |
|---|---|
obj | The Three.js object that defines the constraint in the scene. |
collisionGroup | (Optional) Bitmask, If you define it in blender side... |
collisionMask | (Optional) Bitmask, If you define it in blender side... |
A | (Optional) The Cannon body referenced as A (if set in Blender). |
B | (Optional) The Cannon body referenced as B (if set in Blender). |
To get a reference to your constrain after creation call:
rigger.getCustomConstraint("objectName") as MySuperCoolCustomConstraint
License
MIT